 | |
| Make a bracelet like this! (For anyone who's curious, the other wristbands are for Skillet and To Write Love on Her Arms) |
For starters, unless you want to use your fingers, you're going to need to make something to weave your bracelet.
 Materials
A piece of wood (mine's a scrap piece I found in the garage. Hopefully no one will miss it)
a hammer
Two nails
a ruler
a pencil
Step 1 - using the ruler, draw two dots one inch apart.
Step 2 - Hammer a nail into each mark.
Now you're ready to make a bracelet! Click the jump to find out how to do it.
 Materials
- Small "craft" rubber bands (You can find them practically anywhere for just a few dollars)
- A hook of some sort (sometimes rubber bands will come with one. You can also use a crochet hook, or just your hands)
- The base you just made
- Clips. (Usually in the shape of an S or a C. Almost all packages of rubber bands come with these)
 |
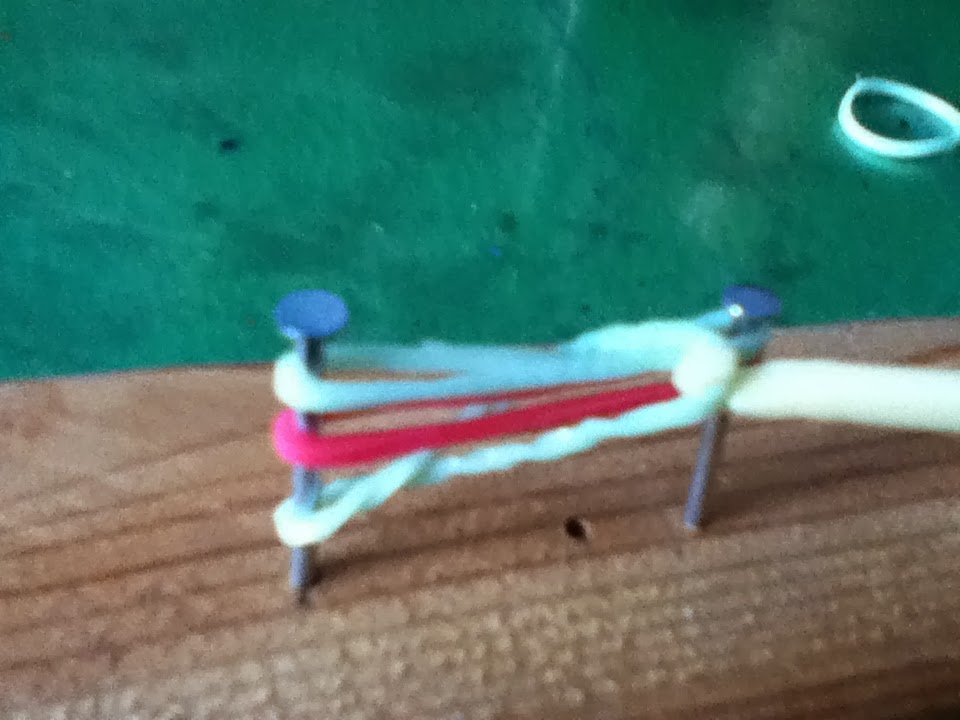
| This is what it should look like with all three rubber bands. |
 Step 1 - Loop the first rubber band around your fingers so that it looks like an 8. Put each end over each nail.
Step 2 - Take the second rubber band, but DON'T twist this one. Simply put it around the nails. Do the same with the third band.

 Step 3 - Using the hook (or your hands), grab the bottom band and loop it over the top on each side. Then, push the remaining bands downward and add another one to the top in the same manner as the last two.
Repeat Step 3 until the bracelet is at the desired length.As you can see, the bracelet will gradually begin to take shape as you keep building on to it.
 |
| (More Skillet merch in the background...) |
 |
| Grab the bands and pull them off. |
Step 4 - Once the bracelet is long enough, you're ready to finish it off. Grab the bands around the nails like in the photo to the left and pull them off.
Step 5 - Pinching the last woven band tightly (the one that's NOT attached to the nails; mine's the red one) remove the other two "extra" rubber bands.
Step 6 - Take your clip and attach it to the loose band. Be careful, because the bracelet may fall apart if you're not holding it tightly enough.
Step 7 - Attach the other end of the bracelet to the clip, and you're finished!
I hope you guys find this tutorial useful! It's really easy to do, once you get the hang of it. If you need more help, there are also videos on YouTube that can show you how to do it. I'll be back again, but until then, have a great weekend!

My little cousin Kyla makes these. She was admiring the ones you made me XD
ReplyDelete